12 Best Windows 11 Settings for Gamers in 2026 (Boost FPS & Reduce Lag)
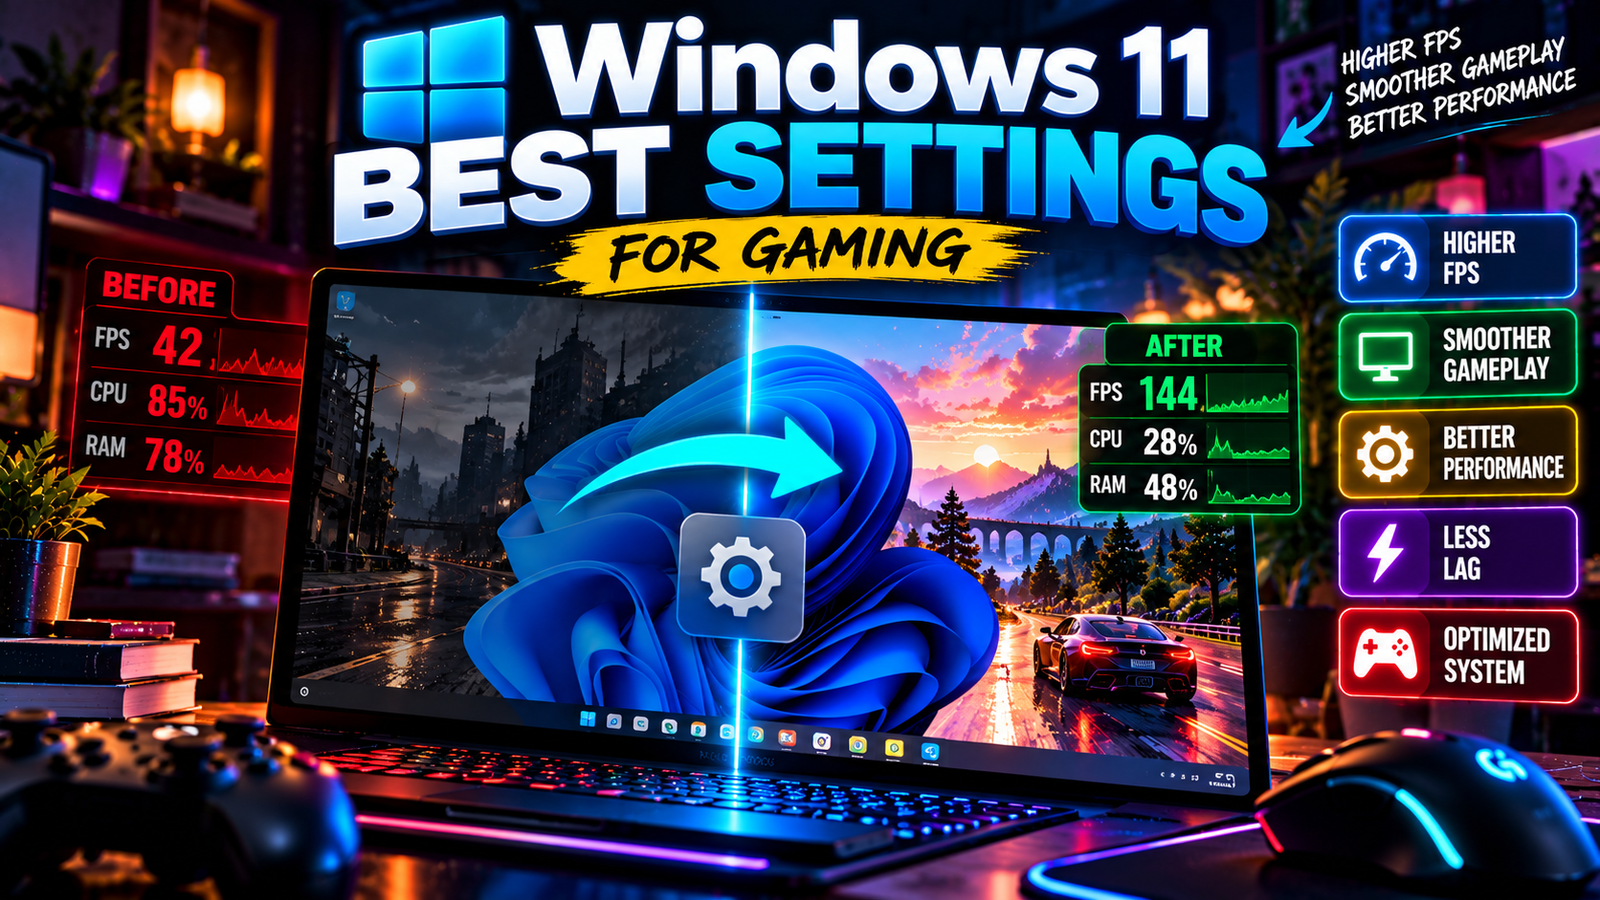
Are you getting unexpected FPS drops, stuttering, or lag while playing your favourite PC games? Before spending money on a new graphics card or upgrading your RAM, take a look at your Windows settings.
Windows 11 includes several features that can influence gaming performance, including Game Mode, graphics preferences, power management, display refresh rates, and background activity.
The problem is that many gamers either ignore these settings or follow random optimization tutorials that recommend disabling important Windows services and changing registry values.
You don’t need to do that.
In this guide, we’ll walk through 12 useful Windows 11 settings for gamers, explain how to configure each one, and identify which changes are worth trying on a gaming PC or laptop.
Important: These adjustments can improve your gaming experience, but the results depend on your CPU, GPU, RAM, storage, display, drivers, and the games you play. Not every setting increases FPS.
Quick Overview: Best Windows Settings for Gamers
| Windows Setting | Recommended Configuration |
| Game Mode | On |
| Display Refresh Rate | Highest supported rate |
| Graphics Preference | High Performance for demanding games |
| Power Mode | Best Performance while gaming |
| Windowed Game Optimizations | On, if supported |
| Hardware-Accelerated GPU Scheduling | Test On and Off |
| Auto HDR | On, if you have a suitable HDR display |
| Startup Apps | Disable unnecessary apps |
| Background Captures | Off if you don’t use them |
| Visual Effects | Reduce unnecessary effects if needed |
| Windows Updates | Keep Windows updated |
| Graphics Drivers | Use current compatible drivers |
1. Turn On Windows Game Mode
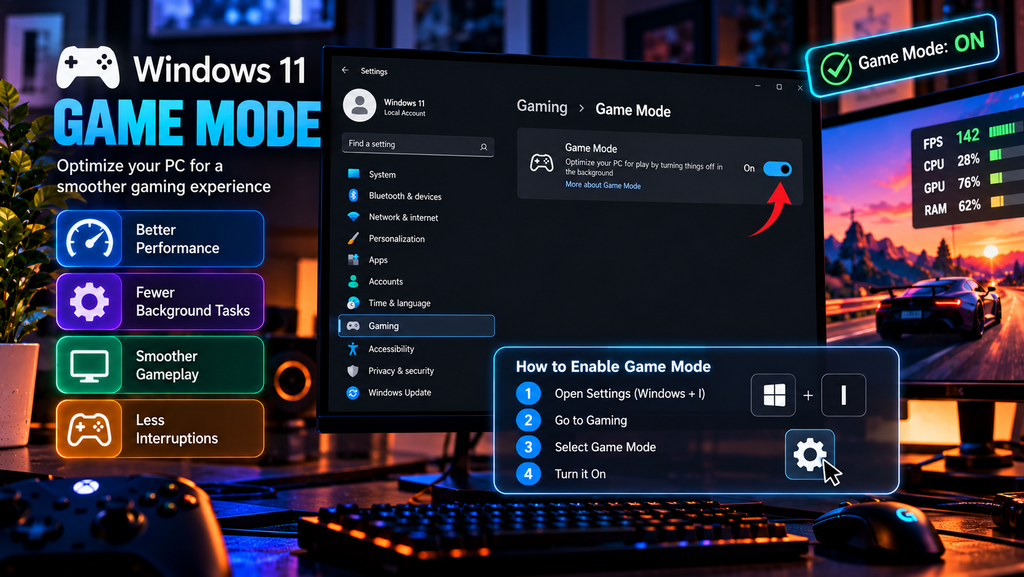
Recommended: On
Game Mode is one of the first settings you should check when optimizing Windows for gaming.
Windows Game Mode helps prioritize your gaming experience by managing certain background activities and reducing interruptions while you play.
It doesn’t guarantee a particular FPS increase, but keeping it enabled is a sensible starting point for most gaming PCs.
How to enable Game Mode
- Press Windows + I to open Settings.
- Select Gaming.
- Open Game Mode.
- Turn on the Game Mode toggle.
That’s it.
Our recommendation: Keep Game Mode enabled unless you experience a specific compatibility issue. Test your game before and after changing settings rather than assuming it has increased performance.
2. Set Your Display to Its Highest Refresh Rate
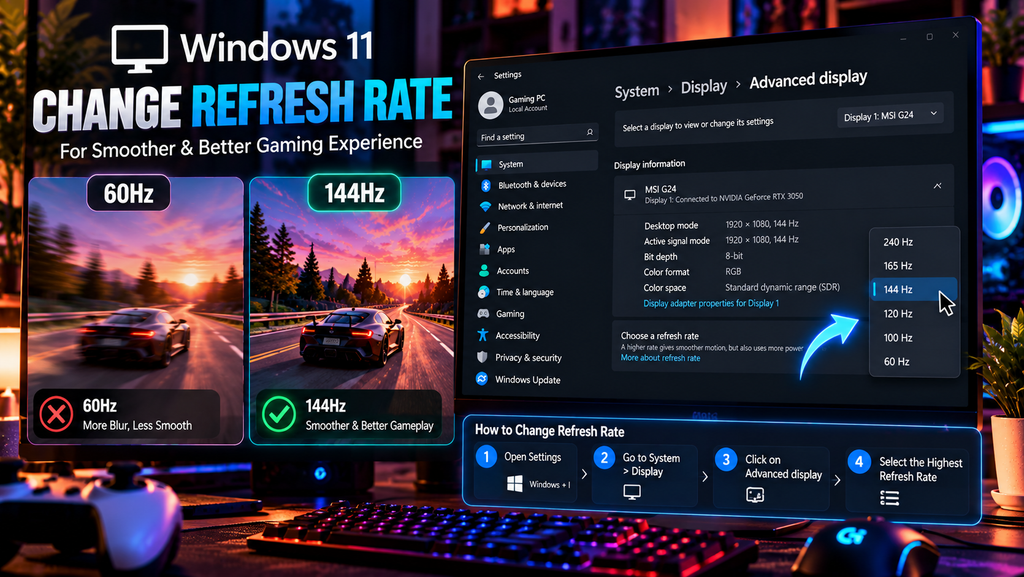
Recommended: Highest supported refresh rate
This is one of the most important settings that gamers sometimes forget.
Imagine buying a 144Hz gaming laptop but accidentally using its display at 60Hz. You’re not getting the full smoothness your screen can provide.
Refresh rate measures how many times your display updates every second.
- 60Hz: Up to 60 display refreshes per second.
- 120Hz: Up to 120 display refreshes per second.
- 144Hz: Up to 144 display refreshes per second.
- 165Hz: Up to 165 display refreshes per second.
- 240Hz: Up to 240 display refreshes per second.
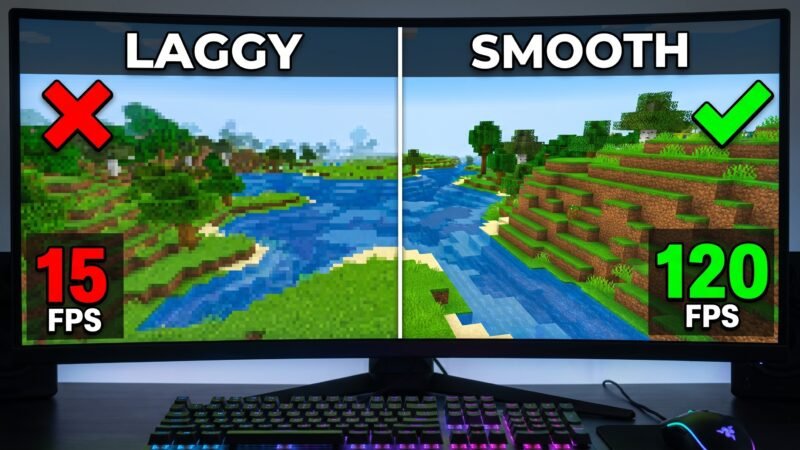
A higher refresh rate can make motion appear smoother and improve responsiveness, provided your hardware and game can deliver enough frames.
How to change your refresh rate
- Open Windows Settings.
- Select System → Display.
- Scroll down and select Advanced display.
- Find the Choose a refresh rate option.
- Select the highest rate supported by your display at its current resolution.
Example: If your gaming laptop supports 144Hz, select 144Hz rather than leaving it at 60Hz.
Remember that a 144Hz display doesn’t automatically mean your game will run at 144 FPS. Your graphics hardware and game settings still matter.
3. Set Your Games to Use the High-Performance GPU
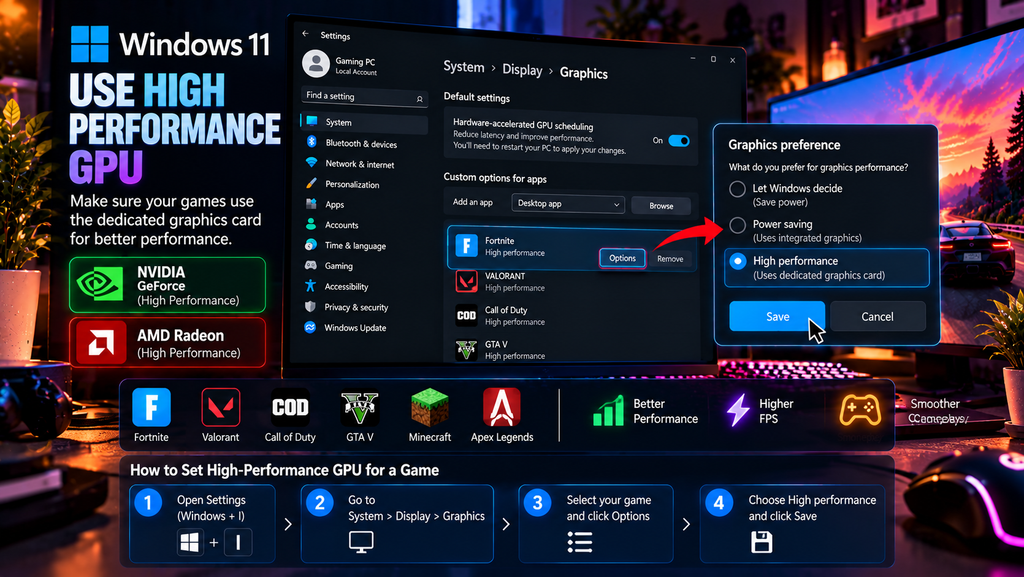
Recommended: High Performance for demanding games
This setting is especially important for gaming laptops and computers with multiple GPUs.
Some systems have both an integrated GPU and a dedicated graphics card. Windows can sometimes assign an application to a power-saving GPU when you would prefer it to use the dedicated graphics processor.
You can manually select the graphics preference for individual games.
How to enable High Performance graphics
- Open Settings.
- Select System → Display.
- Scroll down and open Graphics.
- Find your installed game under the application list.
- Select the game and click Options.
- Choose High Performance.
- Click Save.
If your game isn’t listed, use Browse to locate its executable file.
Why this matters:
On a laptop with integrated graphics and a dedicated NVIDIA or AMD GPU, choosing High Performance can help ensure demanding games use the intended graphics processor.
It does not mean every computer will gain FPS from changing this setting. Systems with only one GPU may not benefit.
4. Change Windows Power Mode to Best Performance
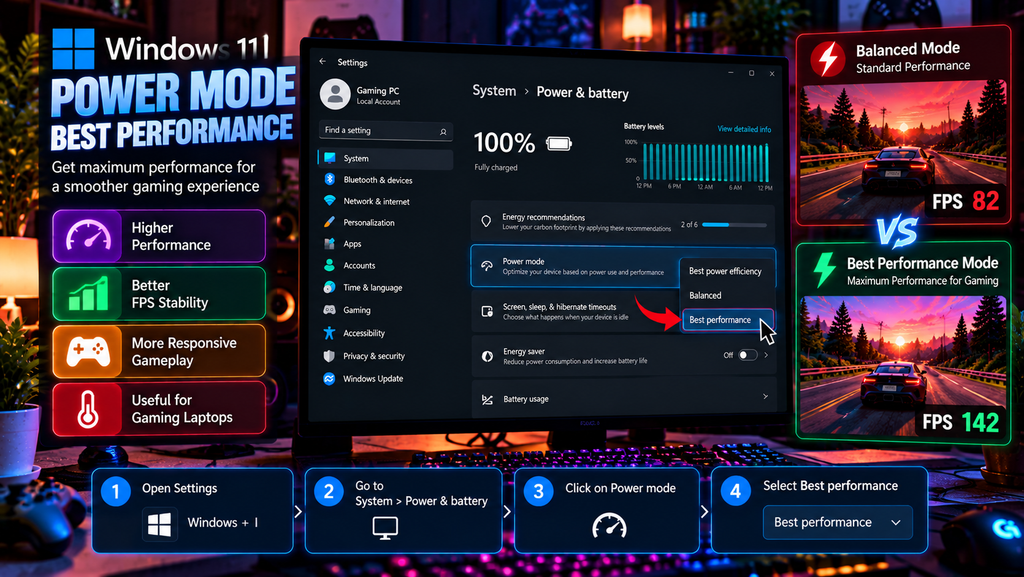
Recommended: Best Performance while plugged in
Windows power management can influence how your computer balances performance and energy consumption.
If you’re playing demanding games while your laptop is set to an energy-saving mode, performance may be limited.
Windows 11 provides different power modes, allowing you to choose between efficiency and performance.
How to change Power Mode
- Open Settings.
- Select System → Power & battery.
- Find Power Mode.
- Select Best Performance when gaming while plugged in.
For laptops, use the balanced or efficiency option when you want longer battery life.
Important: Best Performance can increase power consumption and heat. It is not necessarily the best option when gaming on battery power.
5. Enable Optimizations for Windowed Games
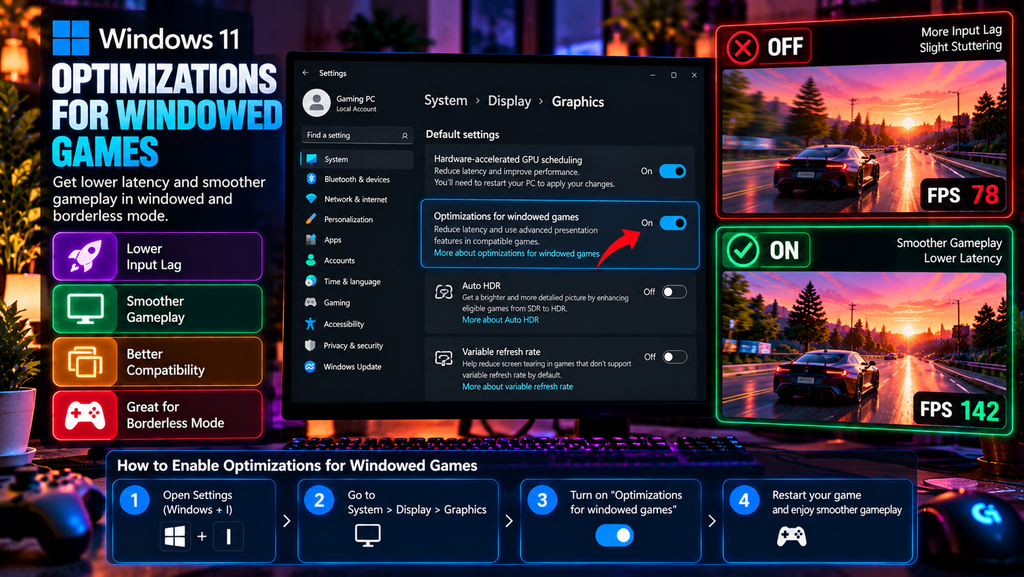
Recommended: On, if you play compatible windowed games
Windows 11 includes a feature called Optimizations for windowed games.
It improves the presentation method used by compatible DirectX 10 and DirectX 11 games running in windowed or borderless-windowed modes.
This can reduce frame latency and enable features such as variable refresh rate on supported systems.
How to enable it
- Open Settings.
- Select System → Display.
- Open Graphics.
- Find Default settings.
- Turn on Optimizations for windowed games.
- Restart your game.
This feature is particularly worth testing if you usually play games in borderless-windowed mode.
Keep in mind that it does not apply equally to every game or graphics API.
6. Test Hardware-Accelerated GPU Scheduling
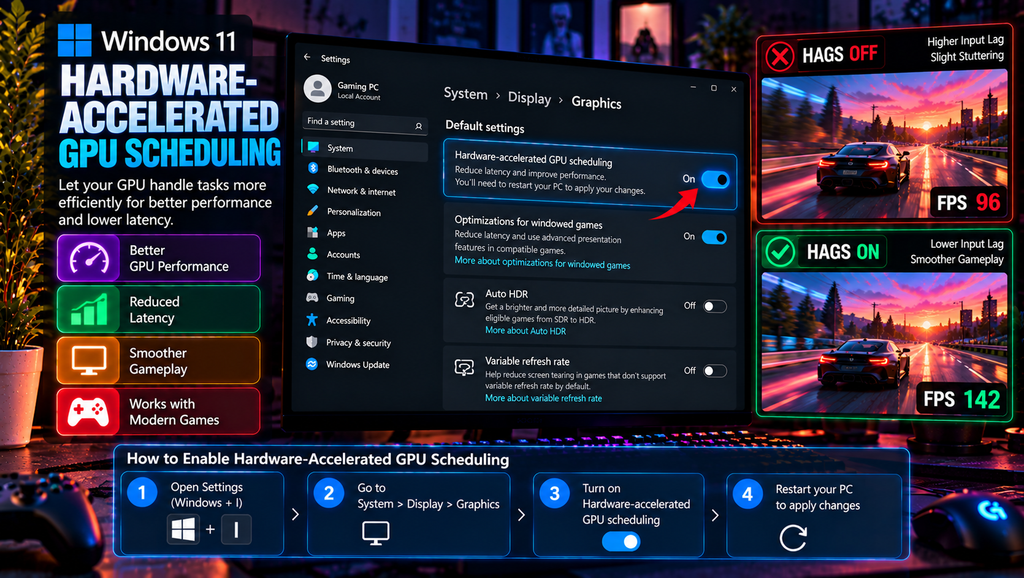
Recommended: Test both On and Off
Hardware-Accelerated GPU Scheduling, often called HAGS, is a Windows graphics feature that changes how GPU scheduling is handled.
It allows a compatible graphics processor to manage certain scheduling tasks more directly instead of relying as heavily on the traditional software scheduling path.
Depending on your hardware, drivers, and game, this setting may help, make little difference, or occasionally cause compatibility or performance issues.
How to find HAGS
- Open Settings.
- Select System → Display → Graphics.
- Open Change default graphics settings.
- Find Hardware-accelerated GPU scheduling.
- Turn it on if available.
- Restart your PC if Windows requests it.
Should you keep it enabled?
Don’t assume On is always better.
Try a game with HAGS enabled, record its average FPS and frame-time consistency, then repeat the test with it disabled.
Keep the option that performs better on your particular system.
7. Enable Auto HDR If Your Display Supports It
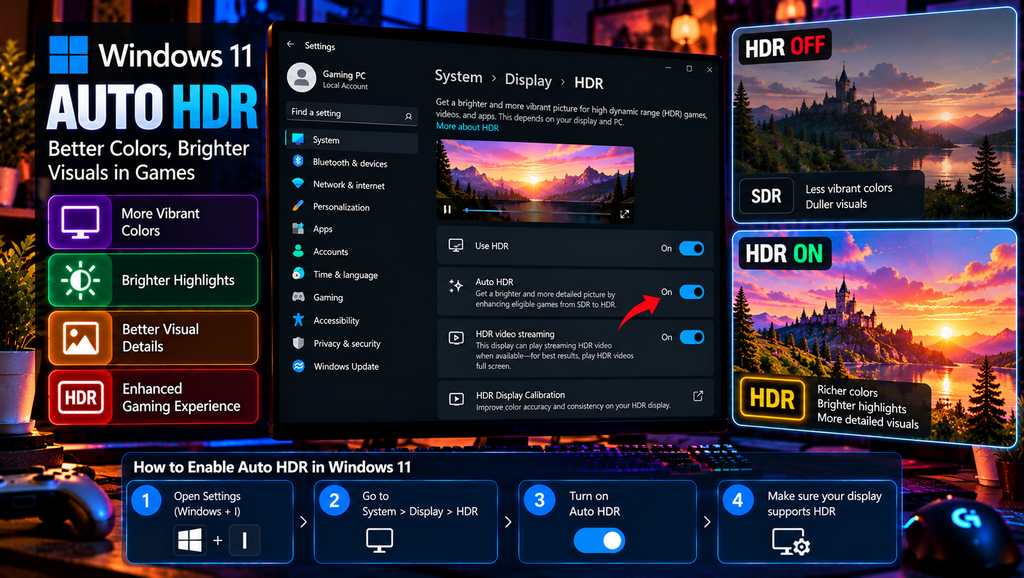
Recommended: Optional, for supported HDR displays
Auto HDR is a Windows 11 feature that can enhance the appearance of compatible SDR games by expanding their presentation toward HDR.
It can make supported games look more vibrant, with brighter highlights and a wider range of colours.
However, Auto HDR is primarily a visual enhancement rather than an FPS optimization.
How to enable Auto HDR
- Open Settings.
- Select System → Display.
- Open HDR.
- Select your supported HDR display.
- Turn on Auto HDR if the option is available.
You should also check whether your monitor or laptop panel supports HDR properly.
Our recommendation: Don’t enable HDR just because the option exists. A display with limited HDR capabilities may not provide the visual improvement you expect.
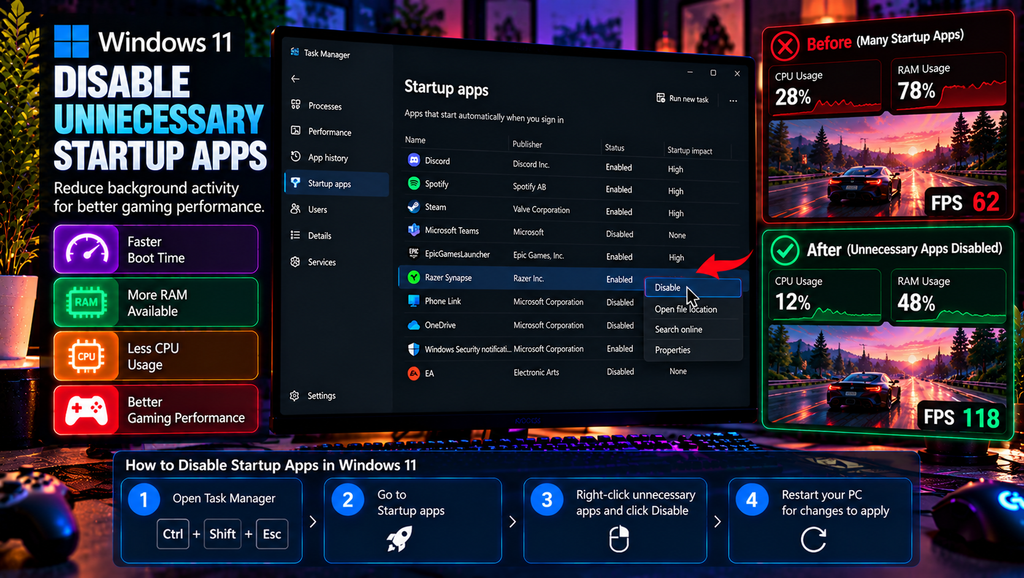
8. Disable Unnecessary Startup Applications
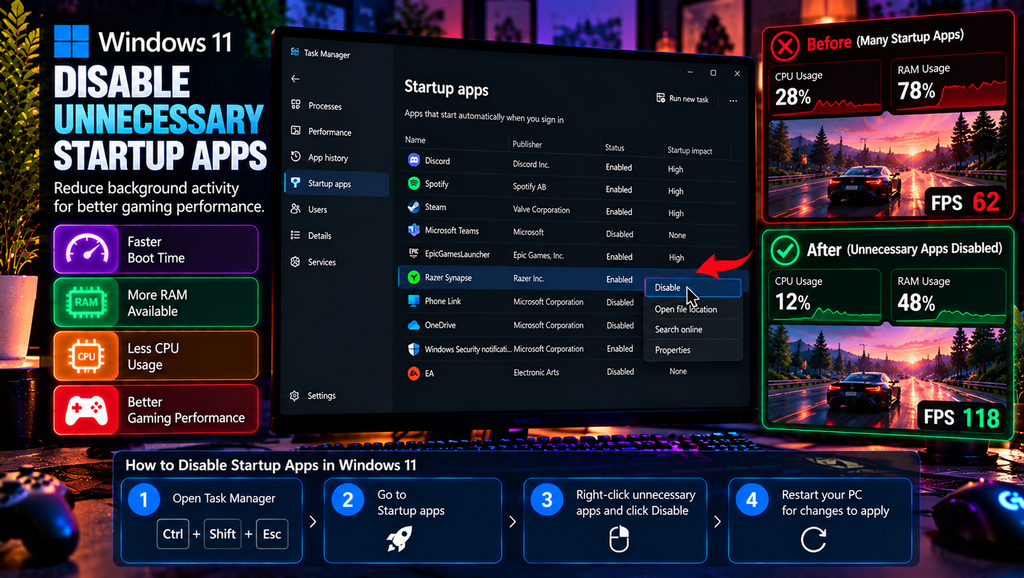
Recommended: Disable apps you don’t need
How many applications start automatically when you turn on your computer?
Some programs quietly run in the background, consuming memory and other system resources.
Although startup applications don’t necessarily reduce FPS while gaming, unnecessary background activity can contribute to a less responsive system.
How to disable startup apps
- Press Ctrl + Shift + Esc.
- Open Task Manager.
- Select Startup apps.
- Review the applications.
- Right-click unnecessary applications.
- Select Disable.
Which applications should you disable?
You can consider disabling applications such as:
- Unnecessary music launchers.
- Apps you rarely use.
- Unneeded update assistants.
- Software that doesn’t need to start with Windows.
Don’t disable security software, essential audio utilities, touchpad software, or hardware drivers without understanding what they do.
You can still open disabled applications manually whenever you need them.
9. Turn Off Background Game Recording If You Don’t Use It
Recommended: Off if you don’t record gameplay
Windows includes gaming capture features that can record gameplay and save clips.
These features are useful, but if you never use background recording, there’s little reason to keep unnecessary capture activity enabled.
What should you do?
- Open Settings.
- Select Gaming.
- Open Captures.
- Look for the background recording option.
- Turn off recording in the background if you don’t need it.
The exact wording and available controls can differ between Windows versions.
Important: This doesn’t mean you should disable every Xbox Game Bar feature. If you use Game Bar for screenshots, recordings, or performance overlays, keep the features you actually need.
10. Reduce Unnecessary Windows Visual Effects
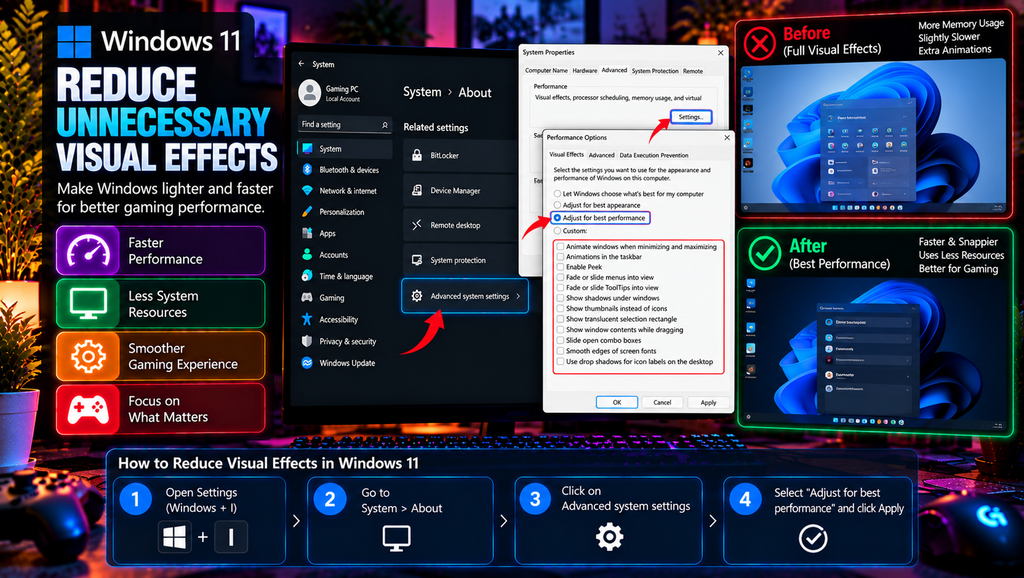
Recommended: Optional, especially for lower-end PCs
Windows 11 includes visual effects such as animations, transparency, and shadows.
They make the operating system look polished, but they can use additional system resources.
Modern gaming PCs generally handle these effects without difficulty. However, older or lower-powered computers may benefit from reducing unnecessary visual effects.
How to adjust visual effects
- Open Windows Search.
- Type Adjust the appearance and performance of Windows.
- Open the matching result.
- Select the Visual Effects tab.
- Choose Adjust for best performance, or manually disable effects you don’t need.
- Click Apply.
You don’t have to disable everything.
If you prefer the Windows 11 appearance, keep the effects you like and remove only unnecessary animations or transparency.
11. Keep Windows and Graphics Drivers Updated
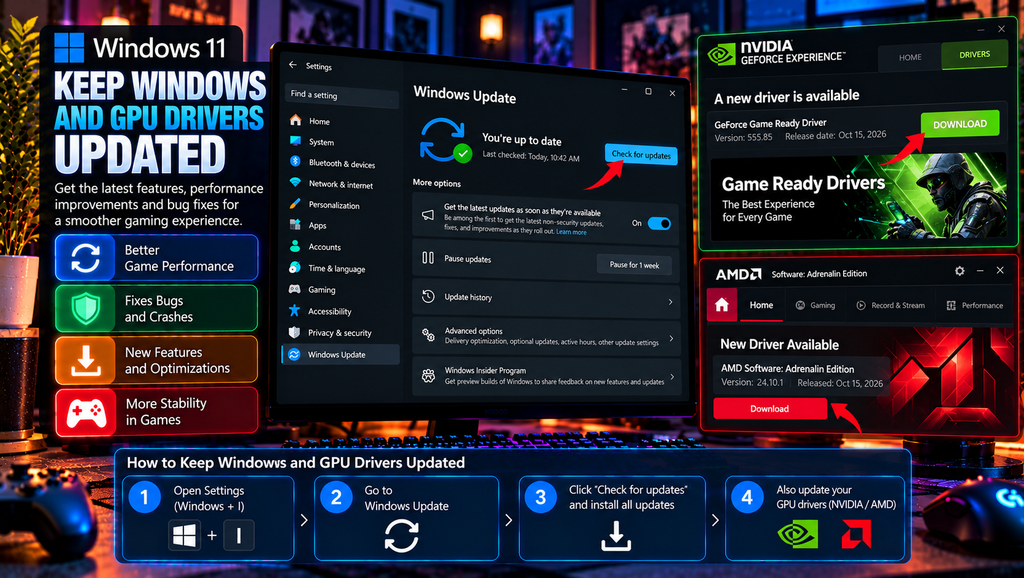
Recommended: Keep compatible stable updates installed
Outdated software can cause compatibility issues, bugs, and performance problems.
Windows updates can include security fixes, stability improvements, and hardware compatibility updates.
Graphics driver updates can also improve support for new games and fix known problems.
How to check Windows updates
- Open Settings.
- Select Windows Update.
- Click Check for updates.
- Install available updates.
- Restart your PC when necessary.
How to update graphics drivers
Use the official software or support website for your graphics hardware.
- NVIDIA: Click Here
- AMD: Click Here
- Intel: Click Here
For gaming laptops, your manufacturer’s support application or website may also provide model-specific drivers.
Our recommendation: Avoid random driver updater applications. Download drivers from official sources and don’t assume that the newest driver is always the best choice for every game.
12. Make Sure Your Games Have Enough Storage Space
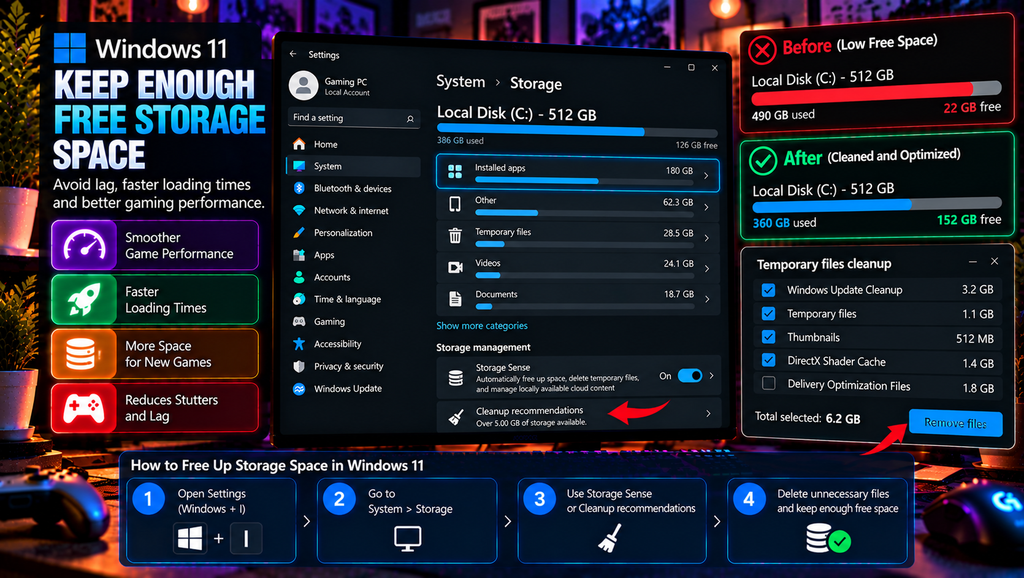
Recommended: Keep sufficient free storage
Your storage drive can influence loading times, updates, and general system responsiveness.
If your Windows drive is almost full, managing storage is a sensible maintenance step.
How to free up storage
- Open Settings.
- Select System → Storage.
- Review Temporary files.
- Remove files you no longer need.
- Uninstall applications or games you don’t use.
- Move large personal files to another suitable drive.
An SSD is generally preferable to a traditional hard drive for modern game loading and system responsiveness.
However, freeing storage does not automatically increase in-game FPS. Don’t delete files you don’t understand just to create more space.
Extra Gaming Tips for Laptop Users
If you’re gaming on a laptop, Windows settings are only part of the picture.
Laptop performance can also depend on temperature, power limits, cooling, and manufacturer-specific performance modes.
Here are five additional things worth checking.
1. Play while connected to the charger
Many gaming laptops operate with different power limits depending on whether they’re connected to their power adapter.
For demanding games, use the manufacturer’s recommended charger.
2. Check your laptop’s performance mode
Some manufacturers provide their own control applications with modes such as Quiet, Balanced, Performance, or Turbo.
Use the appropriate performance mode when gaming, while keeping temperatures under control.
3. Keep the cooling vents clear
Avoid gaming with your laptop on a blanket, pillow, or soft surface.
Use a firm surface that allows airflow through the cooling system.
4. Monitor CPU and GPU temperatures
High temperatures can cause thermal throttling, reducing performance to protect the hardware.
If you experience sudden FPS drops during longer gaming sessions, check temperatures and cooling behaviour.
5. Don’t expect battery gaming to match plugged-in performance
A gaming laptop may reduce CPU or GPU power when running on battery.
Best Performance mode cannot override every hardware or manufacturer power limit.
Best Windows Settings for Gaming Laptops vs Desktop PCs
Not every setting is equally important for every system.
| Setting | Gaming Laptop | Desktop PC |
| Game Mode | On | On |
| Refresh Rate | Highest supported | Highest supported |
| High-Performance GPU | Important on hybrid-GPU models | Useful on multi-GPU systems |
| Best Performance Mode | Mainly while plugged in | Useful when needed |
| Windowed Game Optimizations | Test on | Test on |
| HAGS | Test both options | Test both options |
| Auto HDR | Optional | Optional |
| Startup Apps | Disable unnecessary apps | Disable unnecessary apps |
| Background Recording | Off if unused | Off if unused |
| Visual Effects | Optional | Optional |
| Driver Updates | Use compatible laptop drivers | Use compatible GPU drivers |
| Storage Maintenance | Keep sufficient free space | Keep sufficient free space |
Windows Gaming Tweaks You Should Avoid
Not every optimization tutorial is worth following.
Some guides recommend disabling Windows services, changing registry values, or running mysterious commands to supposedly unlock hidden FPS.
Be careful.
Here are some changes you should avoid unless you understand exactly what they do.
1. Don’t disable random Windows services
Some services are essential for Windows, networking, security, updates, and hardware functionality.
Disabling them can cause unexpected problems.
2. Avoid unknown registry optimization files
Registry changes can affect how Windows works. Don’t import random registry files just because someone claims they provide a huge FPS boost.
3. Don’t use unofficial driver updater tools
Install graphics drivers from official hardware manufacturers or your laptop manufacturer’s support page.
4. Don’t disable Windows Security for FPS
Security software helps protect your system. Disabling it for an unverified performance improvement is not a sensible trade-off.
5. Don’t install random FPS booster applications
Some applications simply close background processes or change settings you can manage yourself.
Others may include unwanted software or make unnecessary system changes.
6. Don’t force every game to use the same graphics settings
Different games have different CPU, GPU, and memory requirements. Test settings individually rather than applying one universal configuration.
How to Check Whether Your Windows Optimization Actually Worked
Changing settings without testing them is a common mistake.
If you want to know whether your adjustments helped, use a simple before-and-after test.
Step 1: Choose a game
Pick a game you play regularly. Use the same game mode, graphics settings, and location for each test.
Step 2: Record your baseline performance
Before changing anything, record:
- Average FPS.
- 1% low FPS, if available.
- GPU usage.
- CPU usage.
- CPU and GPU temperatures.
- Any noticeable stuttering.
Step 3: Change one setting at a time
Don’t change 12 settings simultaneously.
Make one adjustment, restart if required, and test again.
Step 4: Compare the results
Look for improvements in average FPS, frame-time consistency, temperatures, and responsiveness.
Step 5: Keep only useful changes
If a setting makes no difference or causes problems, return it to its previous value.
This helps you build an optimization setup that actually suits your PC.
Frequently Asked Questions
Which Windows settings are best for gaming?
Start with Game Mode, your highest supported display refresh rate, the correct graphics preference, and an appropriate power mode. Then test optional features such as HAGS and windowed game optimizations.
Does Windows 11 Game Mode increase FPS?
Game Mode can help Windows manage certain background activities while gaming. However, it does not guarantee a specific FPS increase, and the difference depends on your system and workload.
How can I increase FPS on Windows 11?
Use the correct GPU, check your display refresh rate, update compatible graphics drivers, reduce unnecessary background activity, and adjust your in-game graphics settings. Your hardware remains the biggest performance factor.
Should I turn on Hardware-Accelerated GPU Scheduling?
Test it on your own system. It can behave differently depending on your GPU, driver, and game. Keep whichever configuration gives you more consistent results.
Should I use Best Performance mode while gaming?
It can be useful when your PC is plugged in and you want to prioritize performance. On laptops, it can increase power consumption and heat, so monitor temperatures.
Does disabling startup apps improve gaming FPS?
It can reduce unnecessary background activity and improve system responsiveness. However, it does not guarantee higher FPS once a game is already running.
Should I disable Xbox Game Bar for better gaming performance?
Not necessarily. If you use its recording, screenshot, or overlay features, you may want to keep them. If you don’t use background recording, disabling that feature is a reasonable option to test.
Is Windows 11 better than Windows 10 for gaming?
Windows 11 includes features such as Auto HDR and optimizations for windowed games. Actual gaming performance depends on hardware, drivers, and individual games. Also, standard Windows 10 support ended on October 14, 2025, so eligible users should consider moving to a supported operating system.
Can these settings improve gaming performance on a low-end PC?
They can help reduce unnecessary background activity and improve the overall experience, but they cannot replace missing hardware resources. For substantial performance improvements, you may need to adjust game graphics or consider a hardware upgrade.
Final Verdict
Optimizing Windows 11 for gaming doesn’t require complicated commands, risky registry modifications, or expensive software.
Start with the settings that matter most: Game Mode, display refresh rate, graphics preference, power mode, and unnecessary background activity.
Then test optional features such as Hardware-Accelerated GPU Scheduling and windowed game optimizations to see how they behave on your system.
If you’re using a gaming laptop, remember that cooling and power management are just as important as Windows settings.
Most importantly, don’t chase unrealistic FPS claims. Make small changes, test your games, and keep the settings that genuinely improve your experience.